4/9/2020
After reviewing a number of mask designs (Mask Design Compendium), I realized that I could do better than a pleated square of fabric with huge air gaps, so I created my own design.
I used what I had, which was a good amount of T shirt material and some new Microfiber towels which grabs dust like a magnet.
Microfiber towels are commonly sold as cleaning cloths for dusting, washing cars, etc. The big box stores like Walmart, Sams Club, Costco all sell them in bundles for about $15 for a bundle of 36 or so.
I started with a rectangle and modified it to better fit a face and added a wire nose piece.
Here is the pattern I ended up with.
I would recommend that you obtain a sheet of cardstock to make the pattern. You only want to make this once and then get on with making masks.
I used the card stock that is commonly attached to the backside of a pad of paper. Its just right in terms of flexibility and stability.
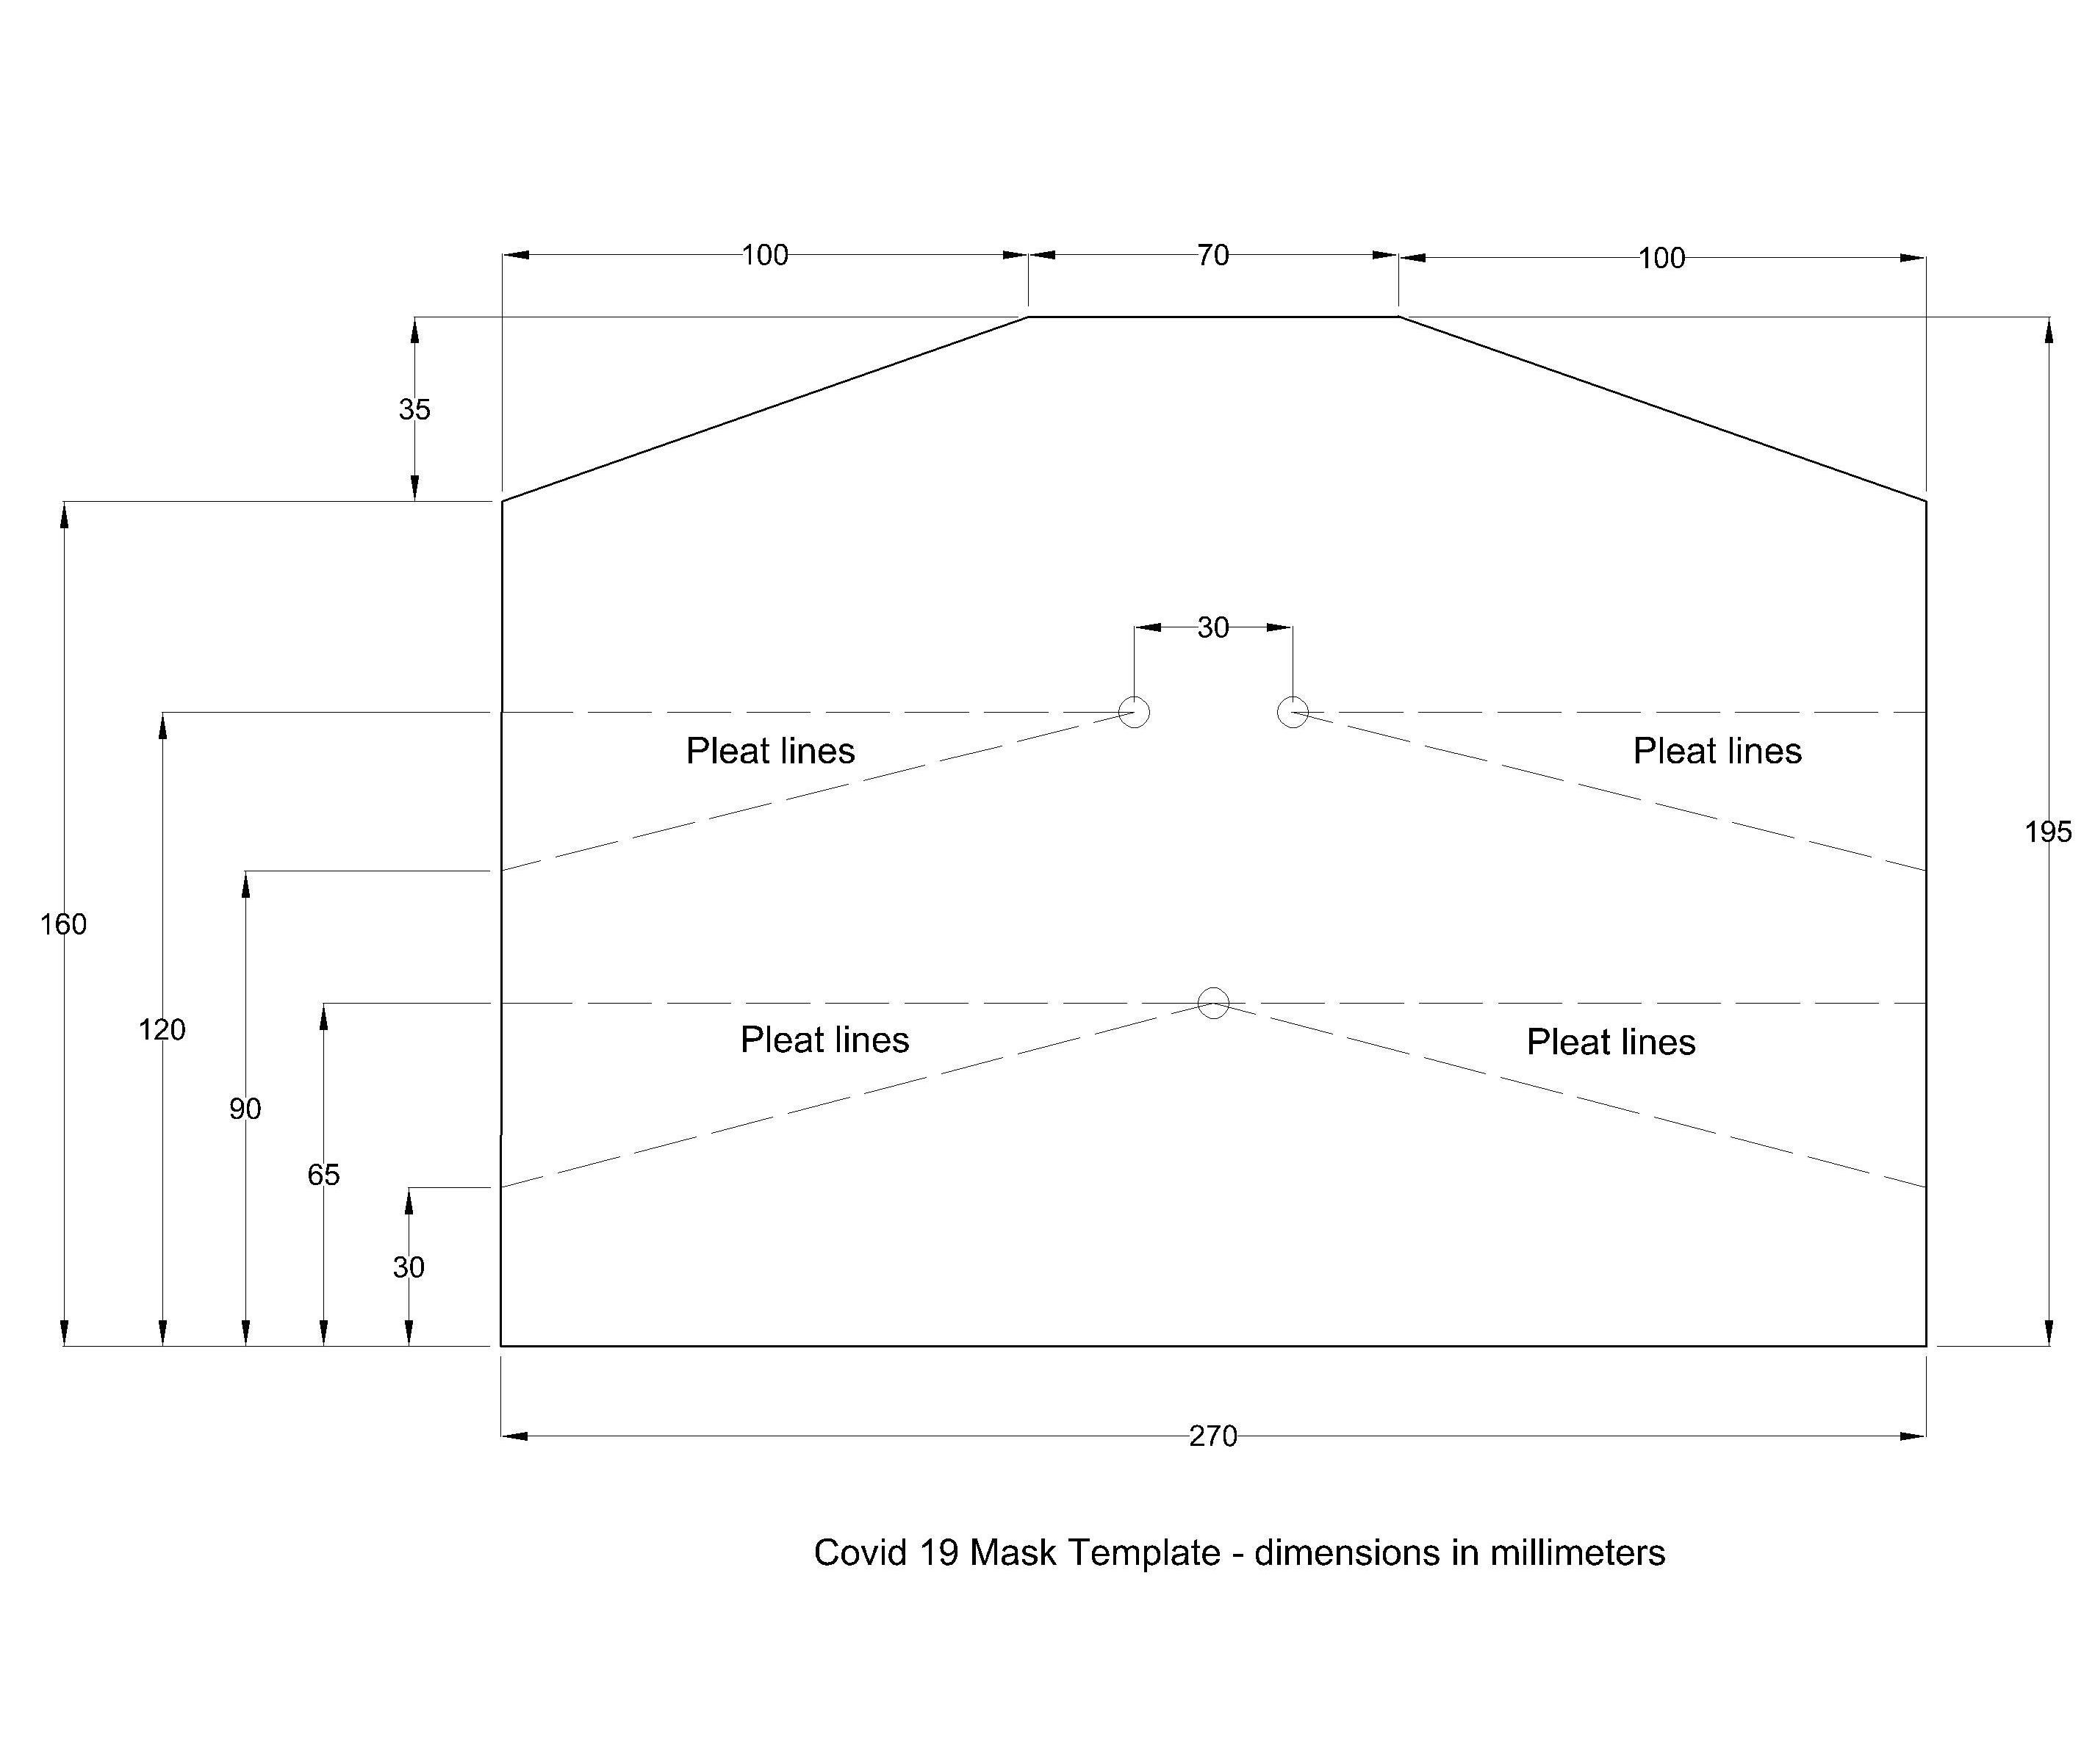
Here is a drawing of the pattern.
Mask Template
The dimensions are in millimeters. Most school rulers are scaled in inches and millimeters in the USA.
However if this looks too hard, do this:
1. Find a piece of 8 1/2 x 11 inch paper or cardstock (thin card board)
2. Cut 20 mm or 3/4 inch off the 8 1/2" width.
3. Cut 10 mm or 3/8 inch off the length. That is the starting rectangle that you need.
4.
Now cut off the top corners and mark the dart lines (incorrectly labeled as pleat lines on the drawing) using the millimeter scale on a school ruler.
5. Punch the three holes in the pattern using a pencil, pen, nail, pointy end of scissors, etc.
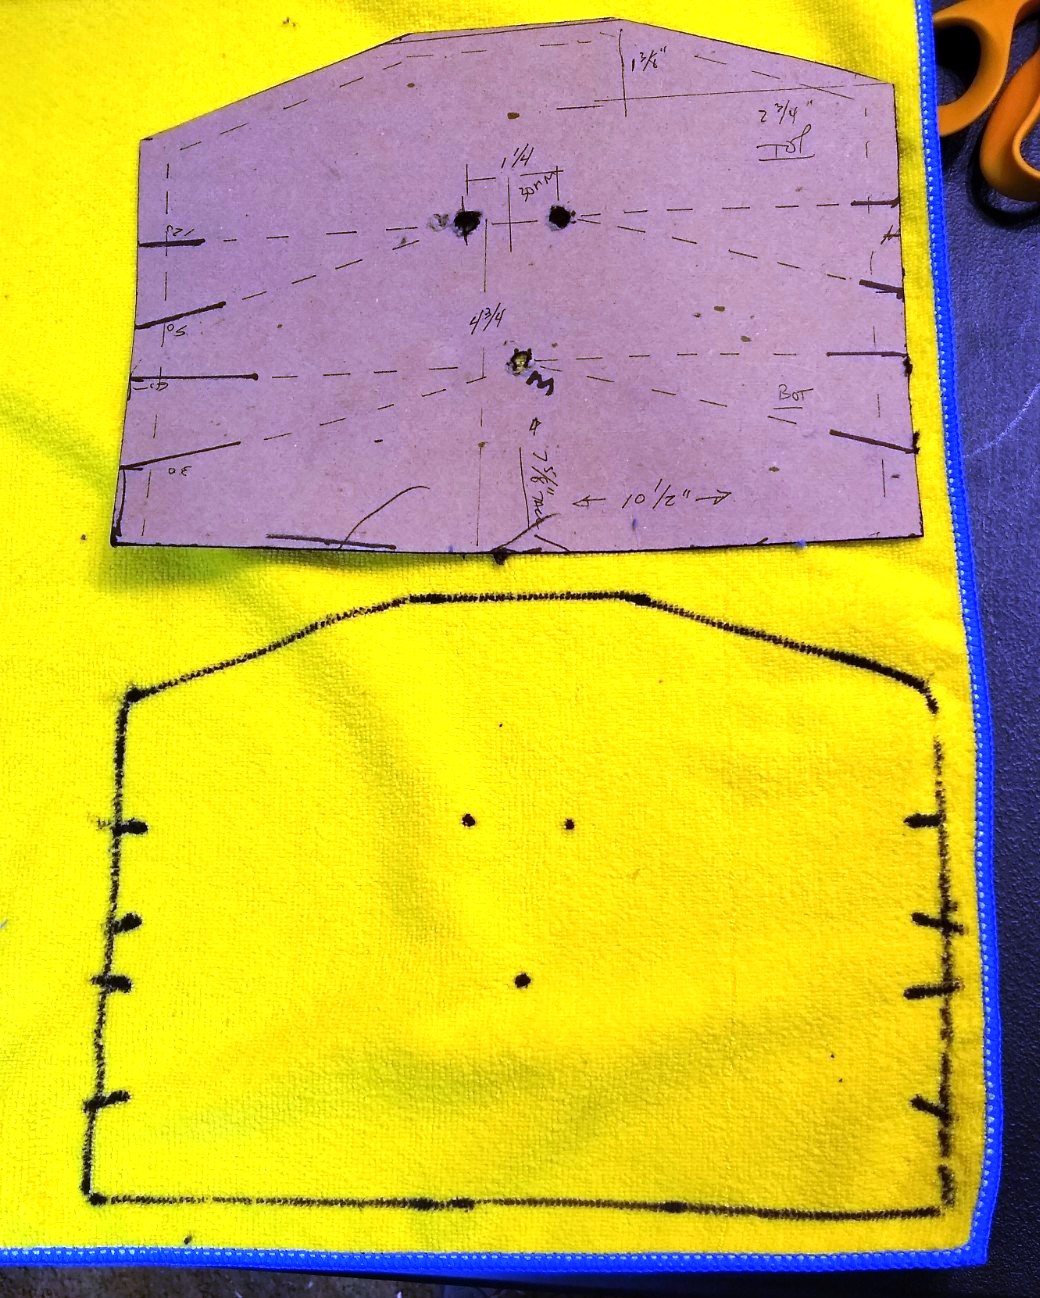
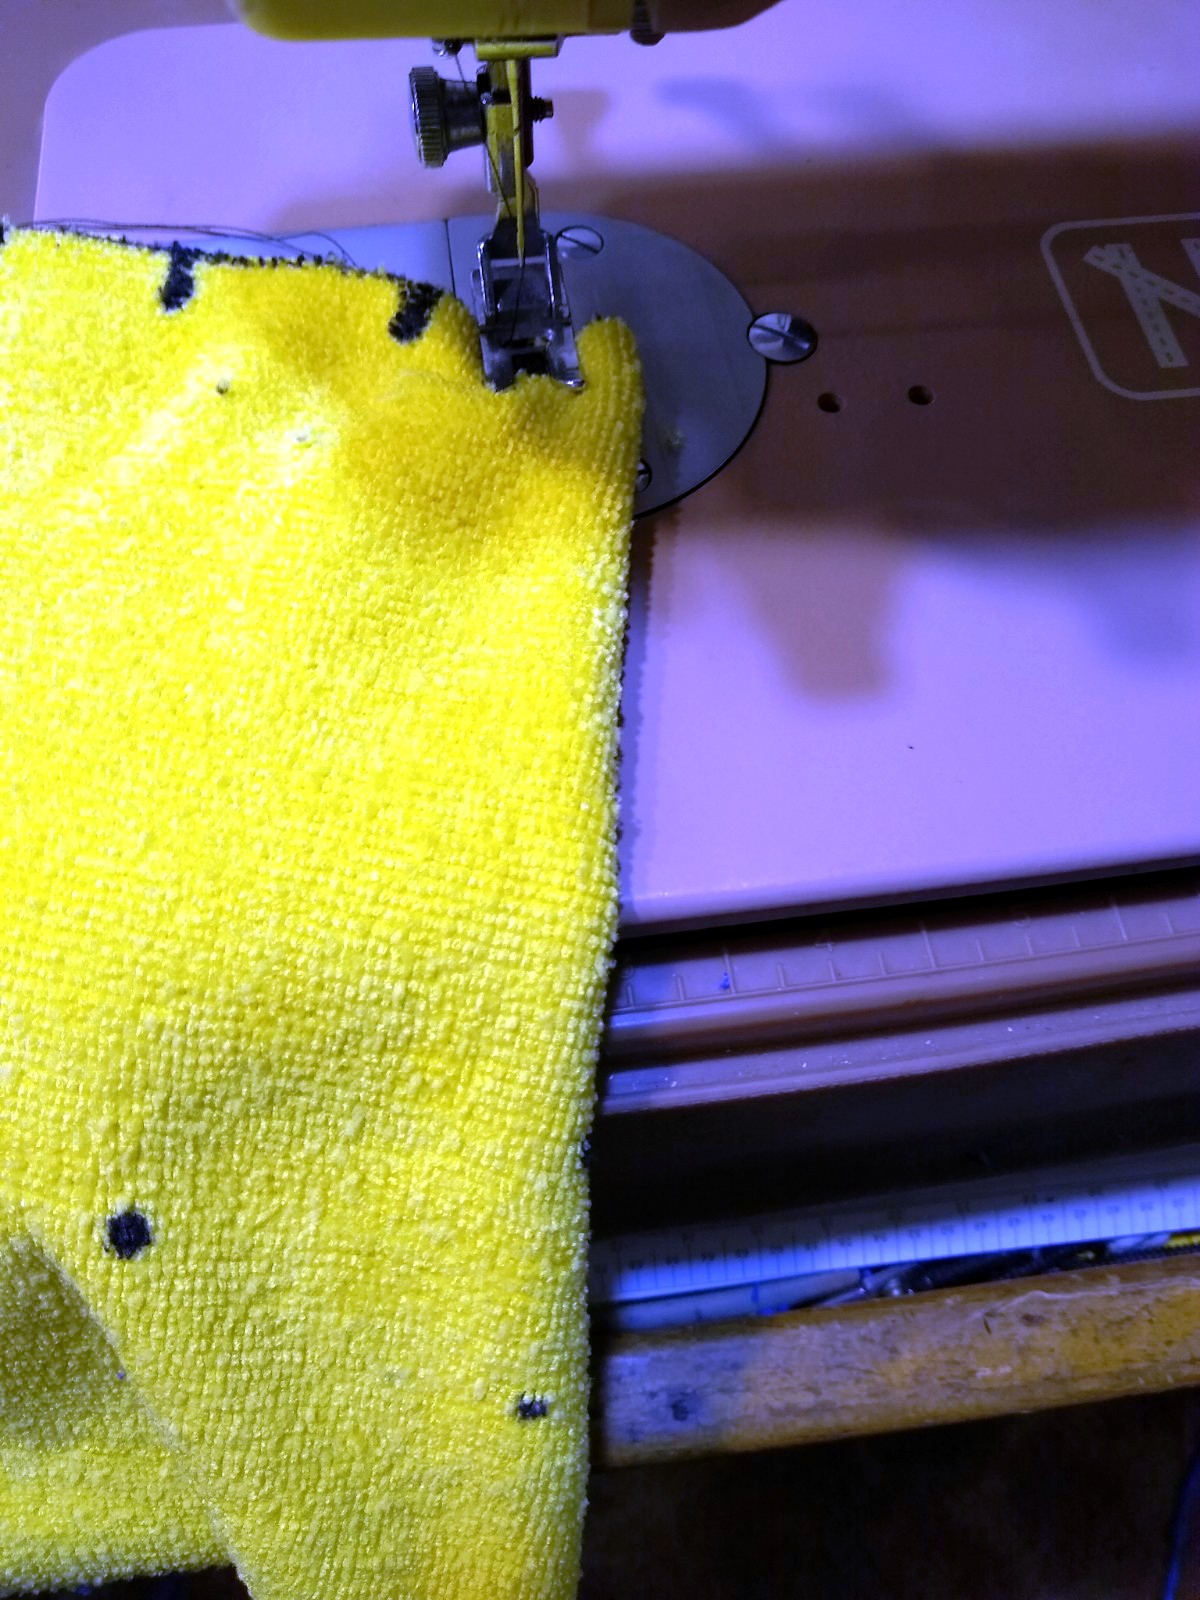
Take the pattern and lay it on the "wrong side" of the Microfiber towel. (The "wrong side" is the less finished side with less fuzz, the fuzz side is the side you will see on the completed mask)
Get a Sharpie/pen/pencil that will mark the Microfiber cloth.
Mark on the cloth; three dots, one in each hole.
Draw the outline on the cloth.
Lift the carboard and put a dash with a marker on the cloth under the ends of the dart lines (labeled as pleat lines on the drawing).
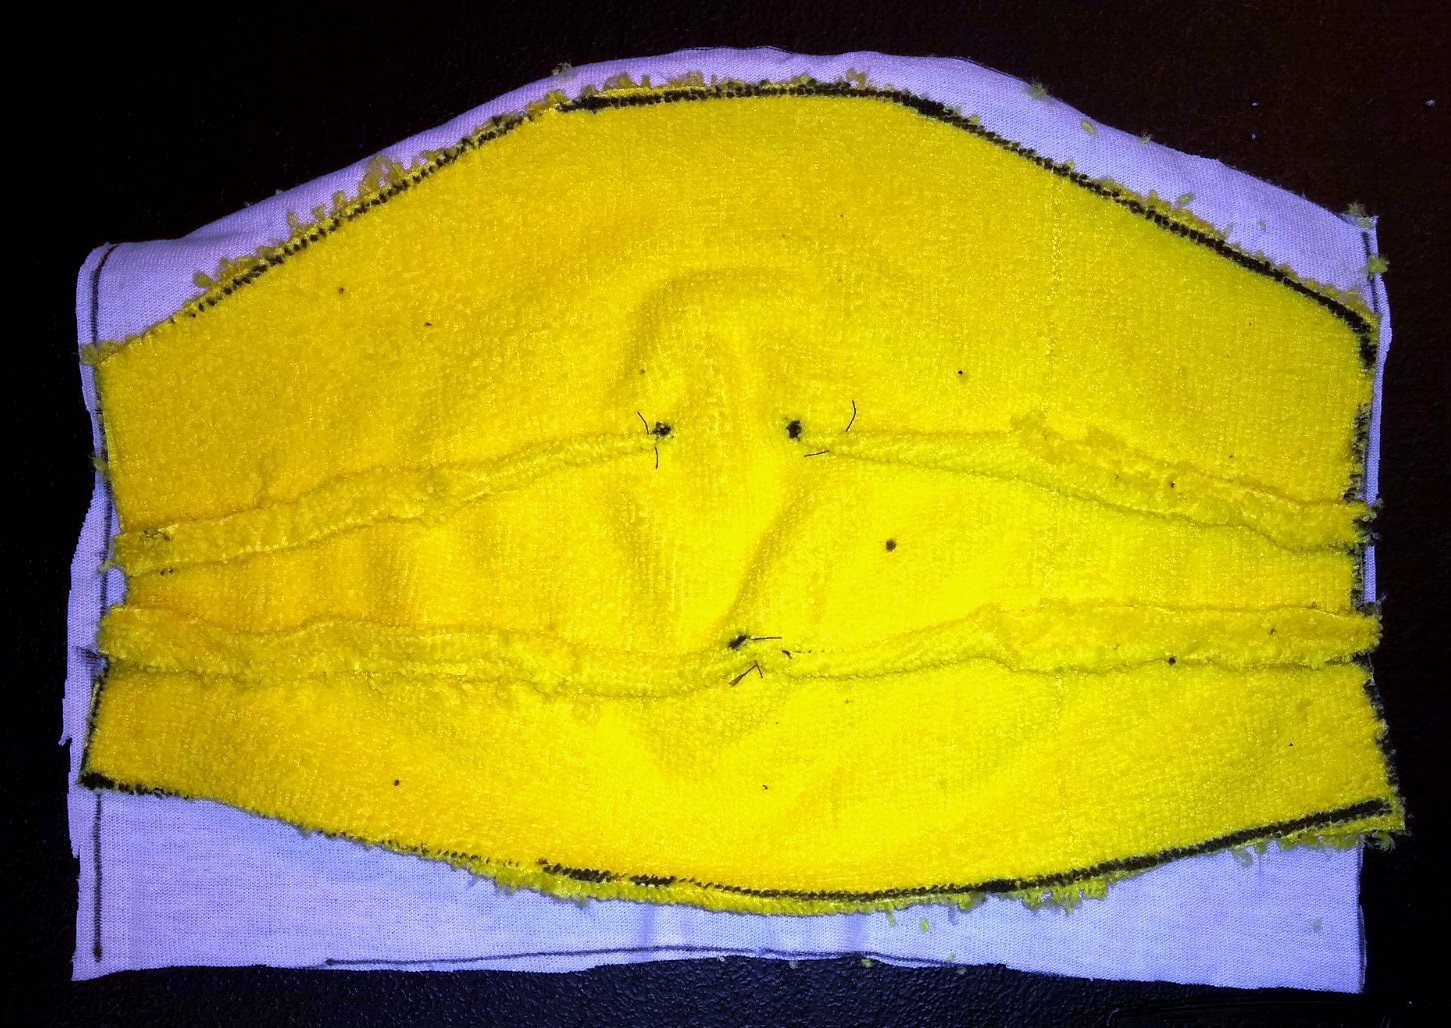
It should look like this when you are done.
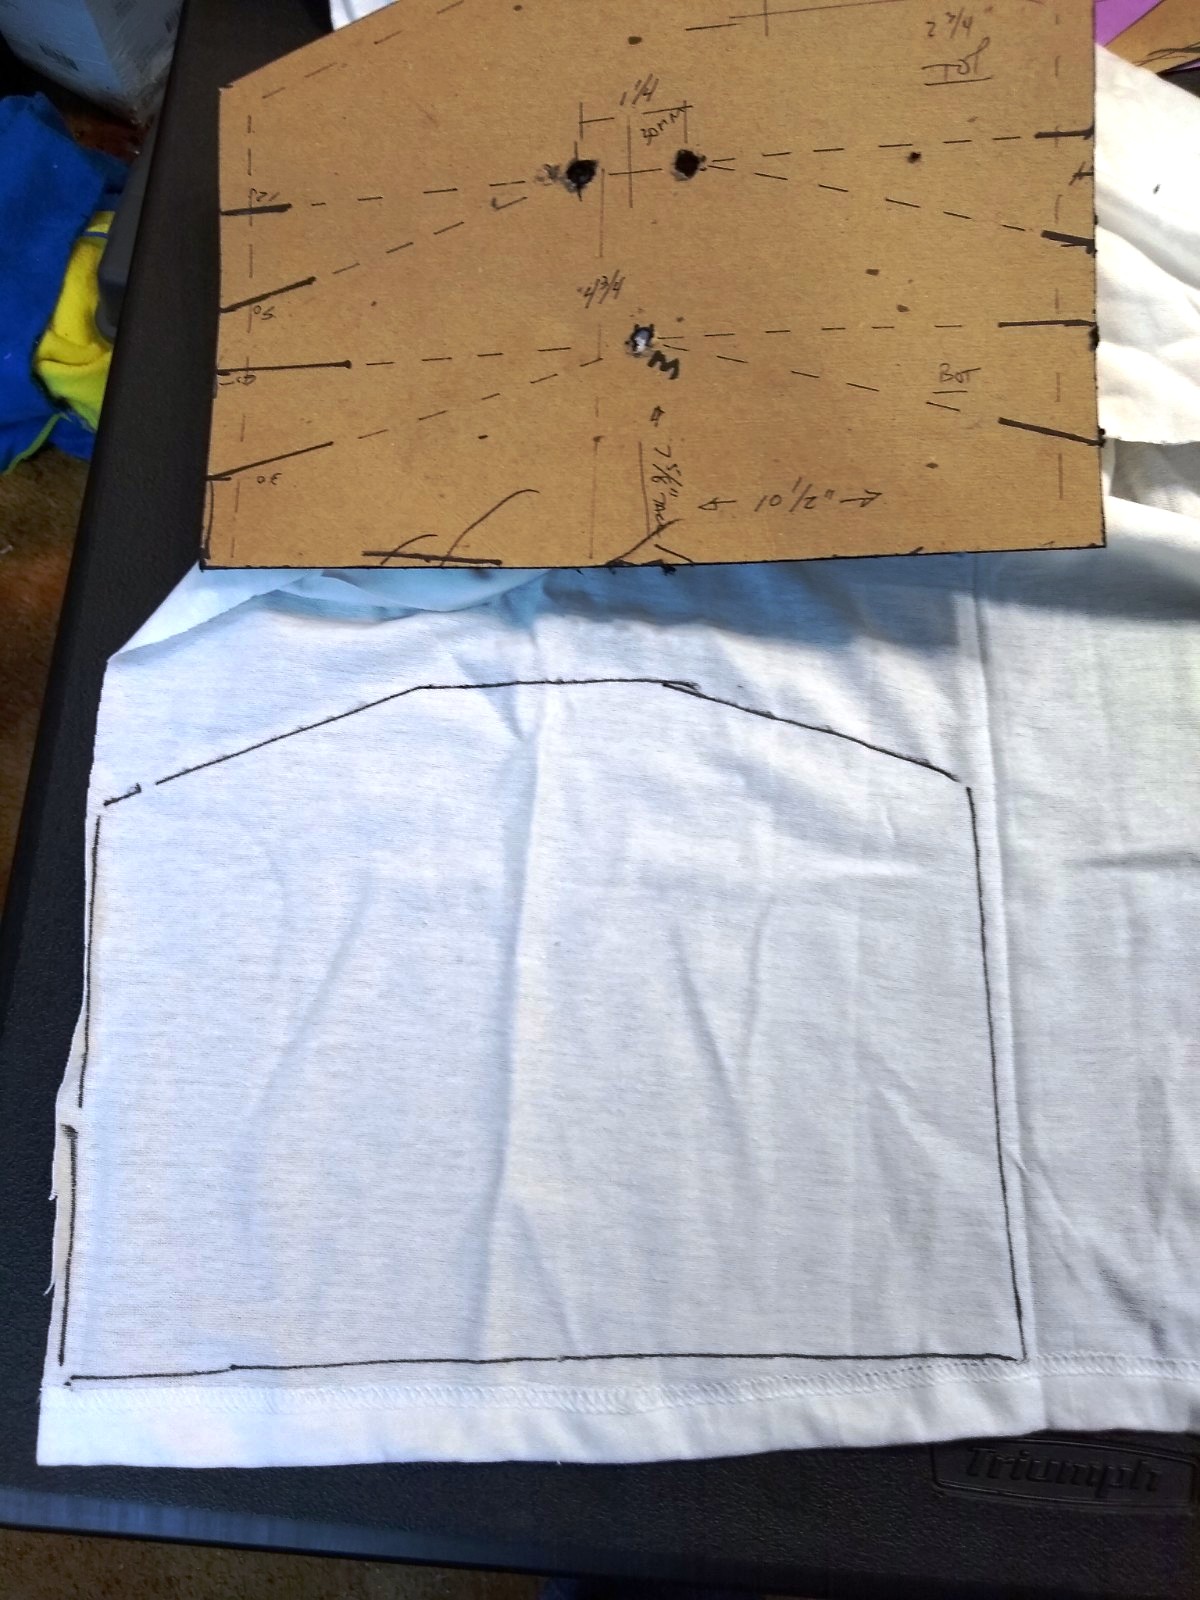
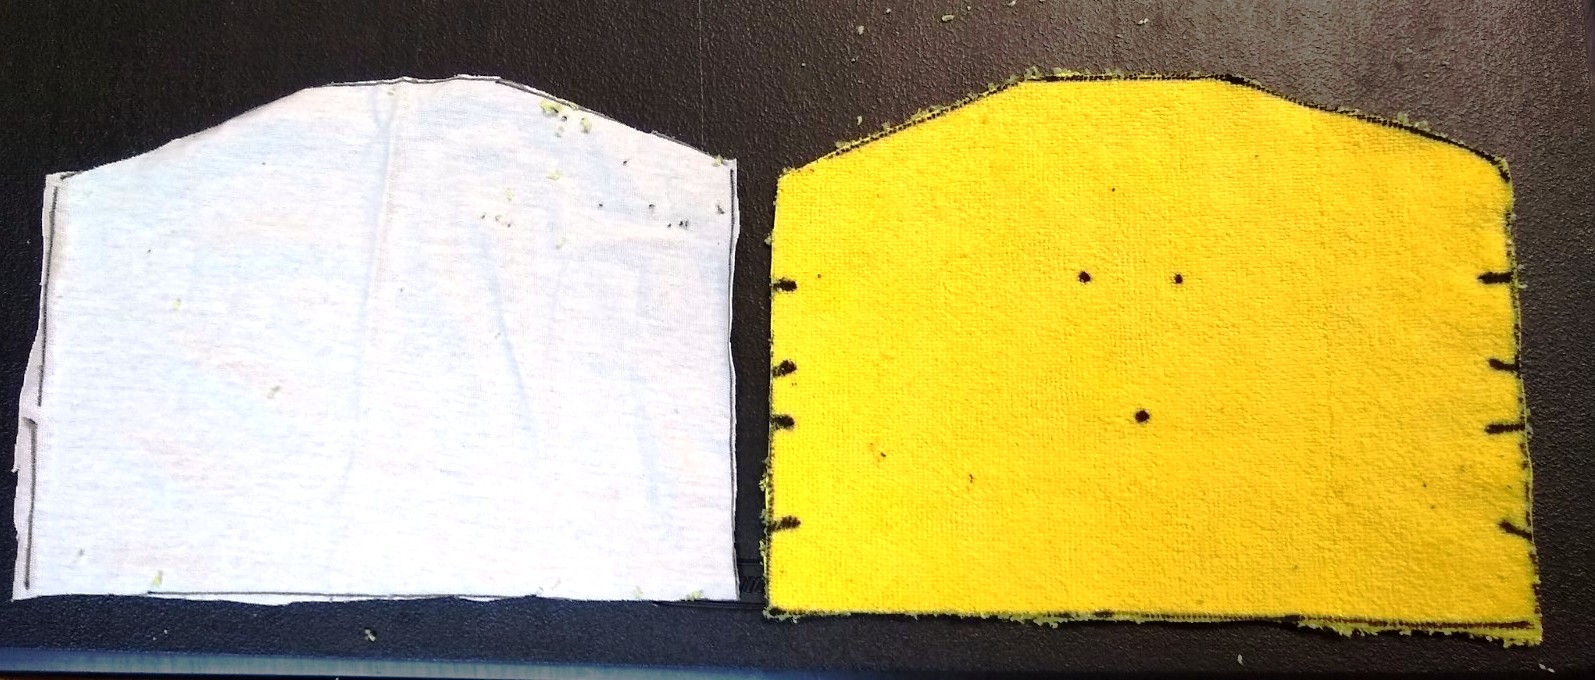
Next Mark the T shirt material as well and cutout.
To sew the darts; Fold the fabric over to form the dart, "right side" to "right side", so the dart marks touch together, and put the mark under the sewing machine foot.
Sew towards the dart end dot. Back up over the starts and ends of your seam to help lock the seam. Do this for all 4 darts.
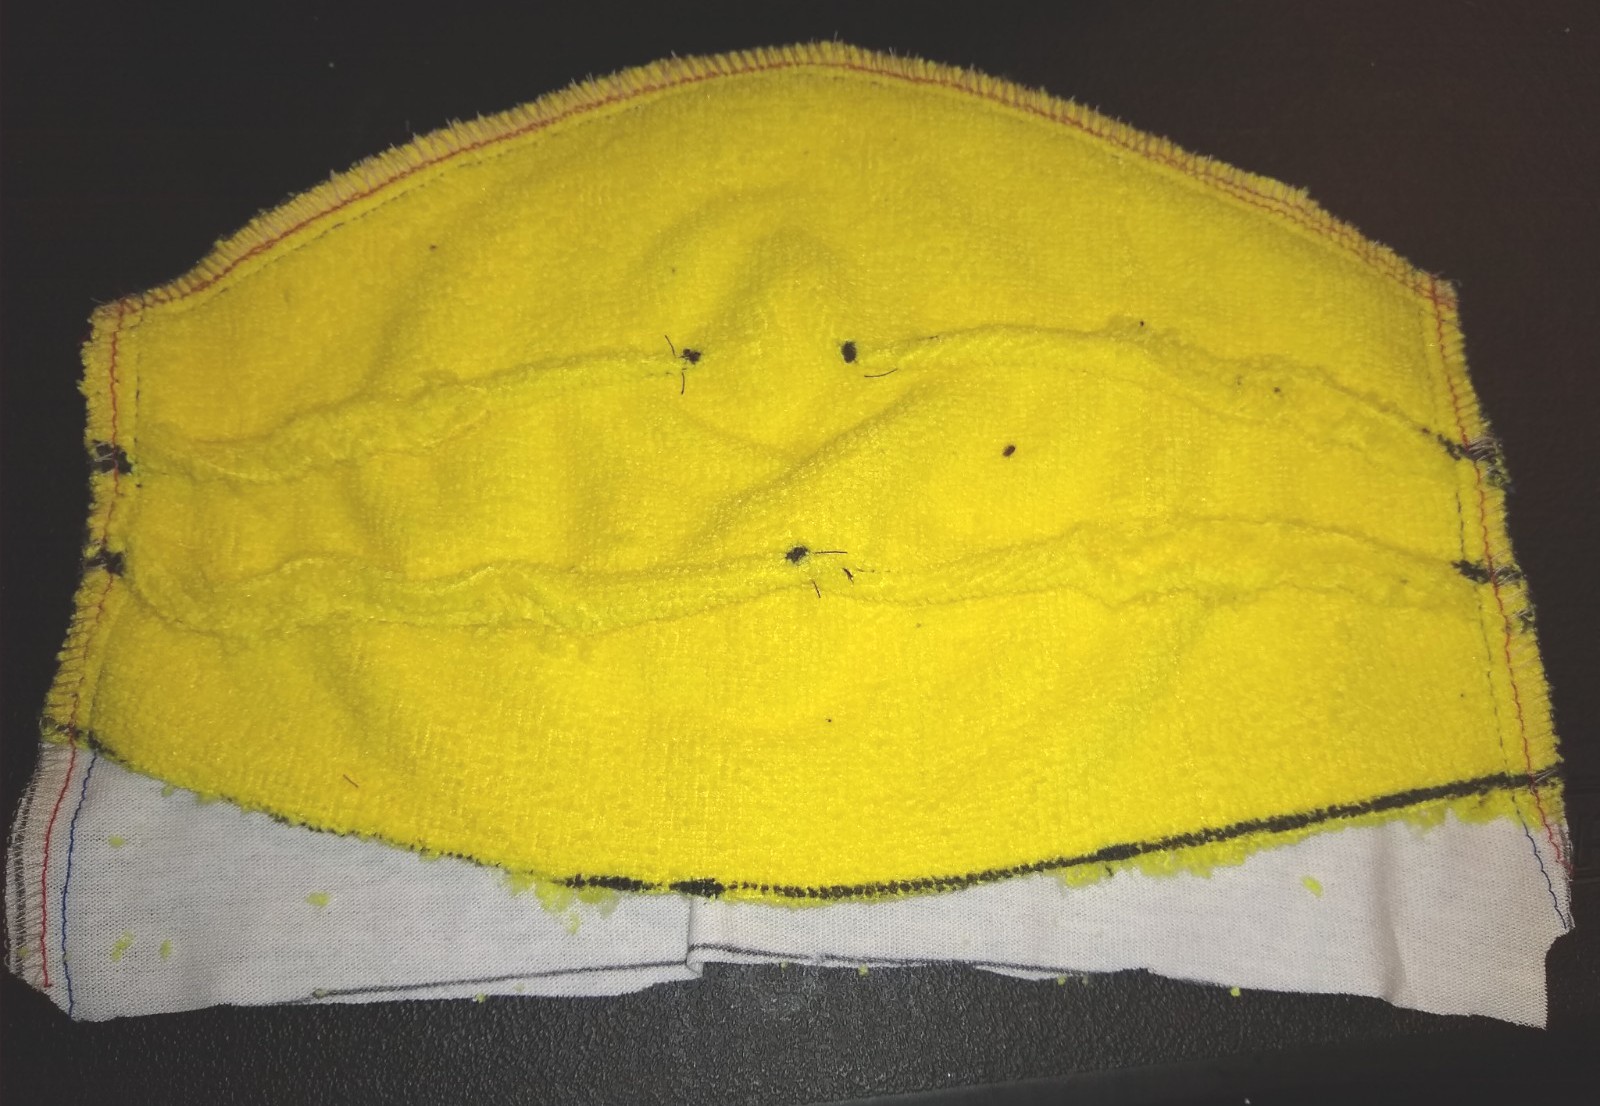
Here is the first dart sewn off.
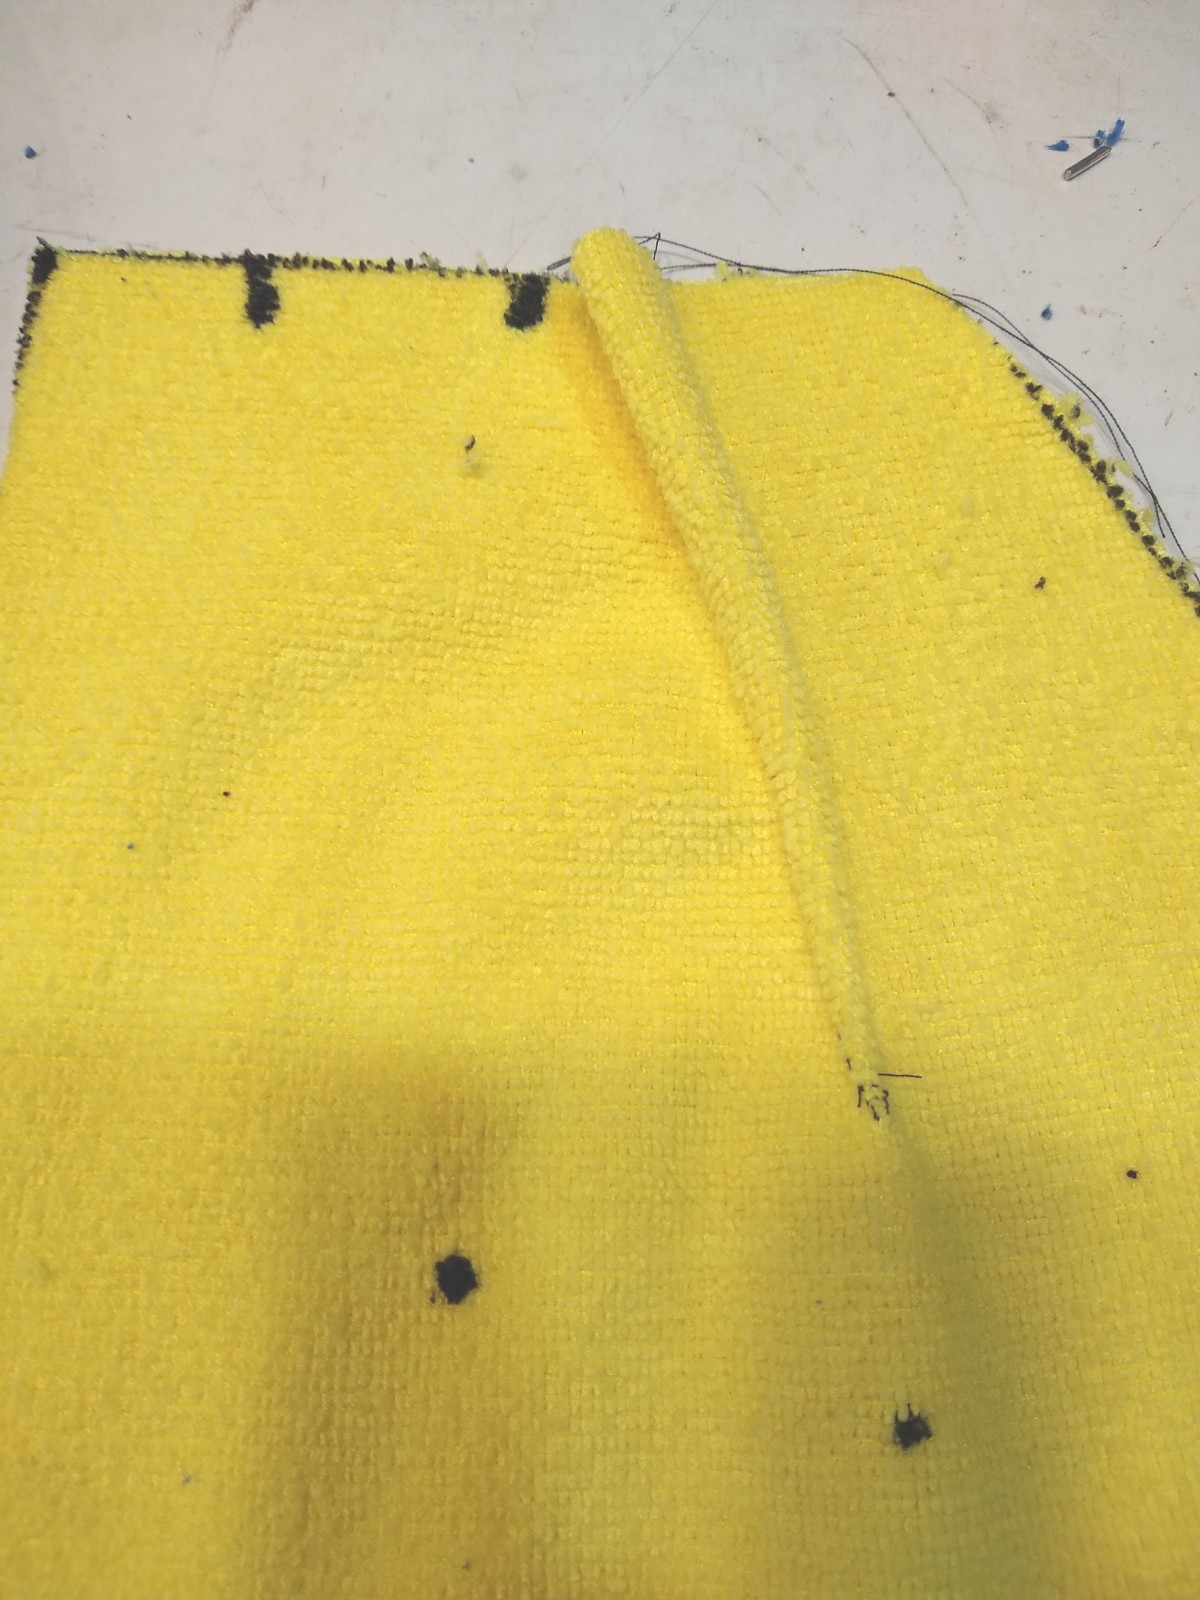
Here are all 4 sewn off;
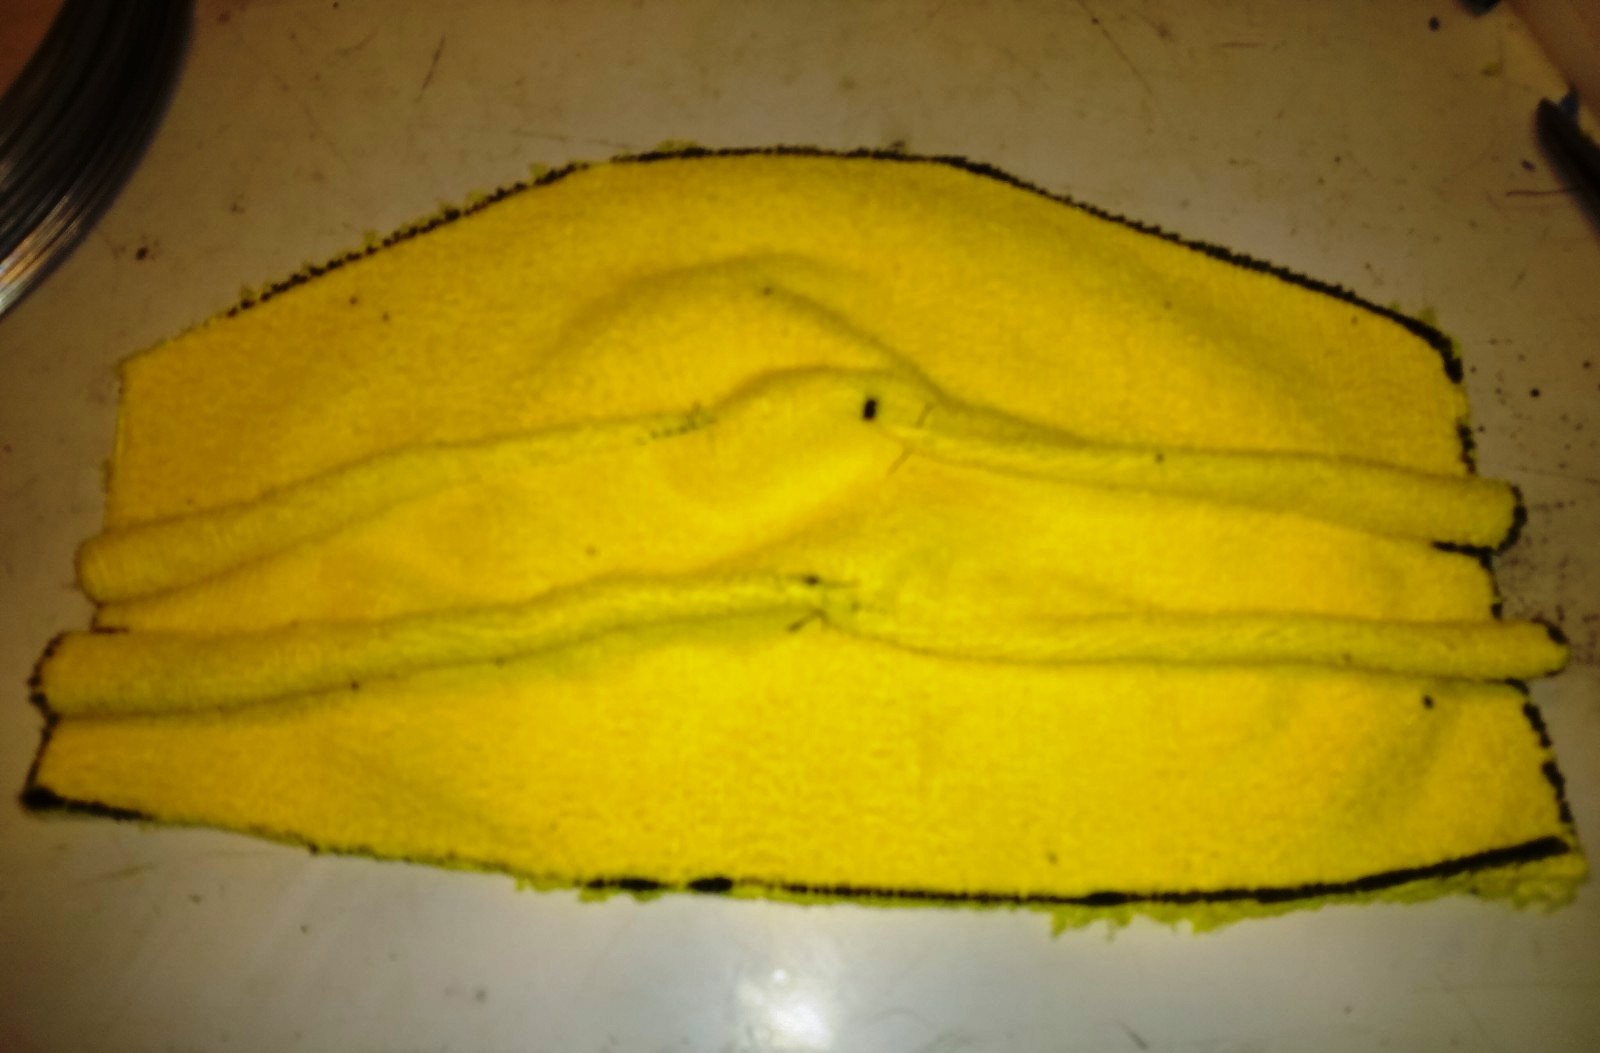
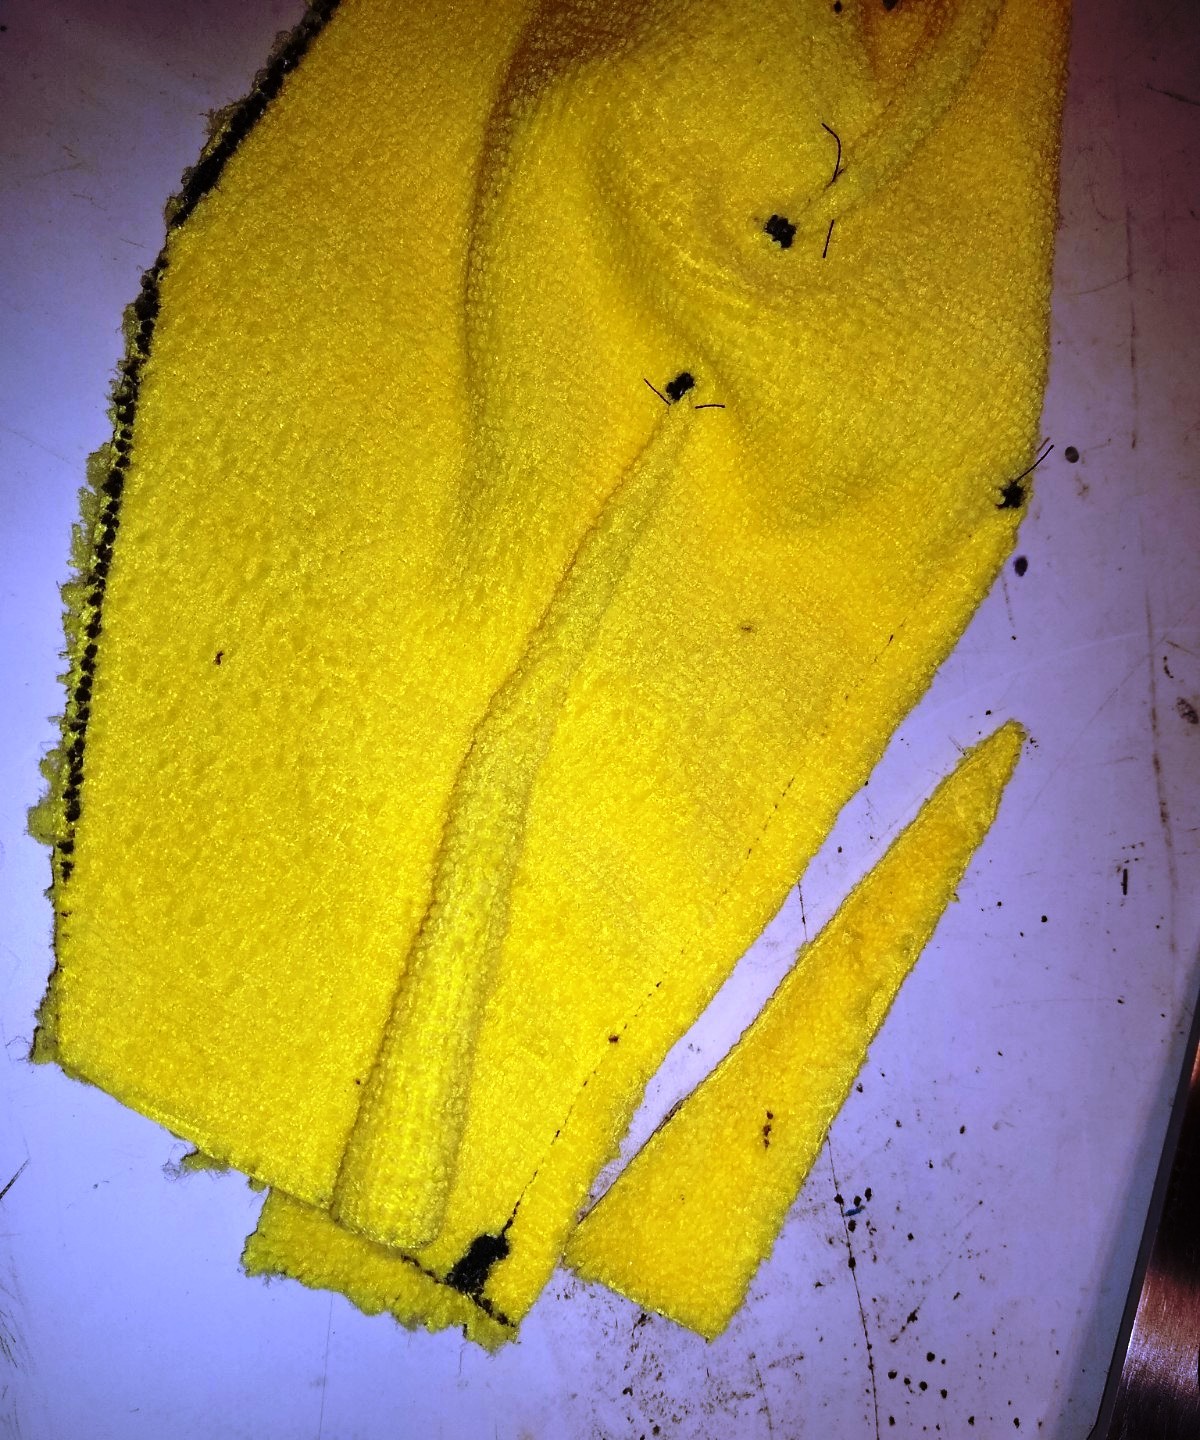
Next, trim off the excess dart material so you don't have big bumps in your mask. Do this for all 4 darts.
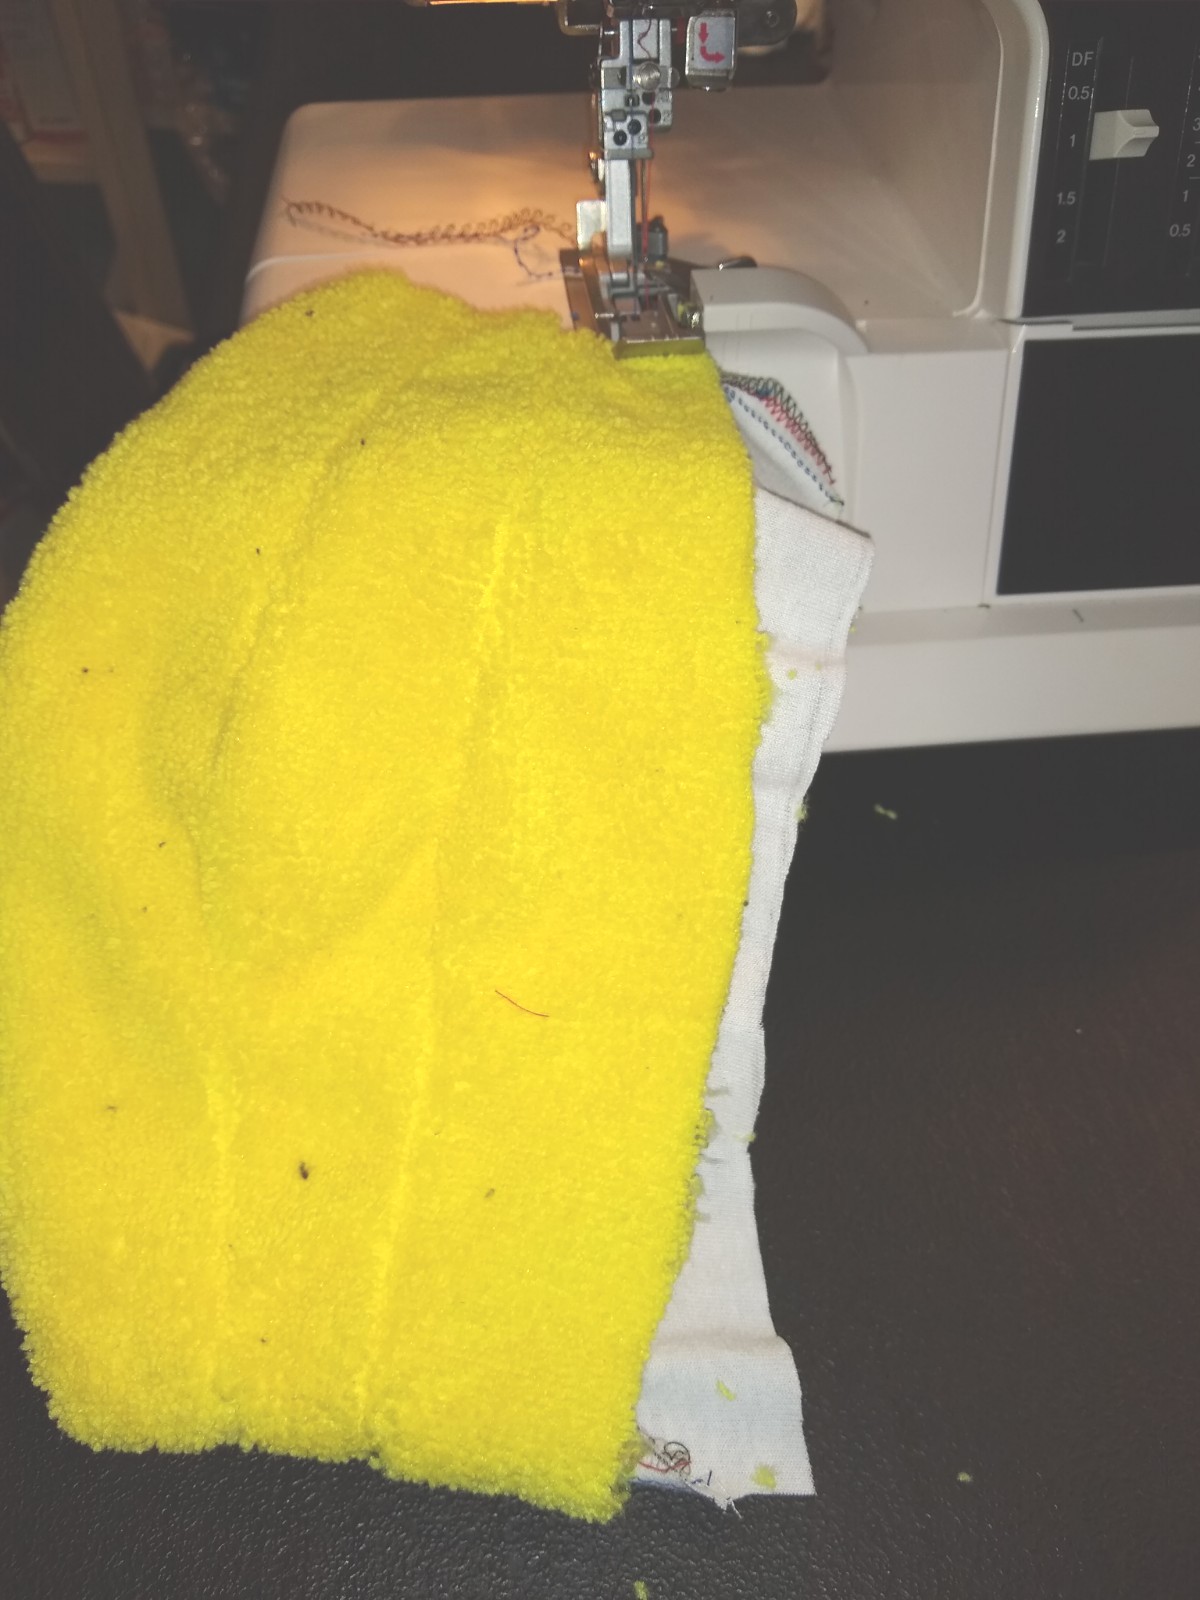
Lay your outer mask material onto of the T shirt material and stretch the mask material out.
The micro fiber material will stick to the T shirt material so you don't need any pins!
Note that the "right side" is against the T shirt material.
Sew the two layers together on the left, top, and right side.
You want about a 3/8 or 10mm seam. This was done with a 5 thread serger, but a regular straight stitch machine would work. Slightly better would be a fine zig zag stitch.
Keep the T shirt material on the bottom when you do this as your sewing machine will be better able to pull the material through the machine.
Next turn the mask inside out, pushing out the corners, and then stitch off the bottom.
Again, a serger is not required. If you roll the fabric inside you could again, use a straight stitch seam or a zig zag seam.
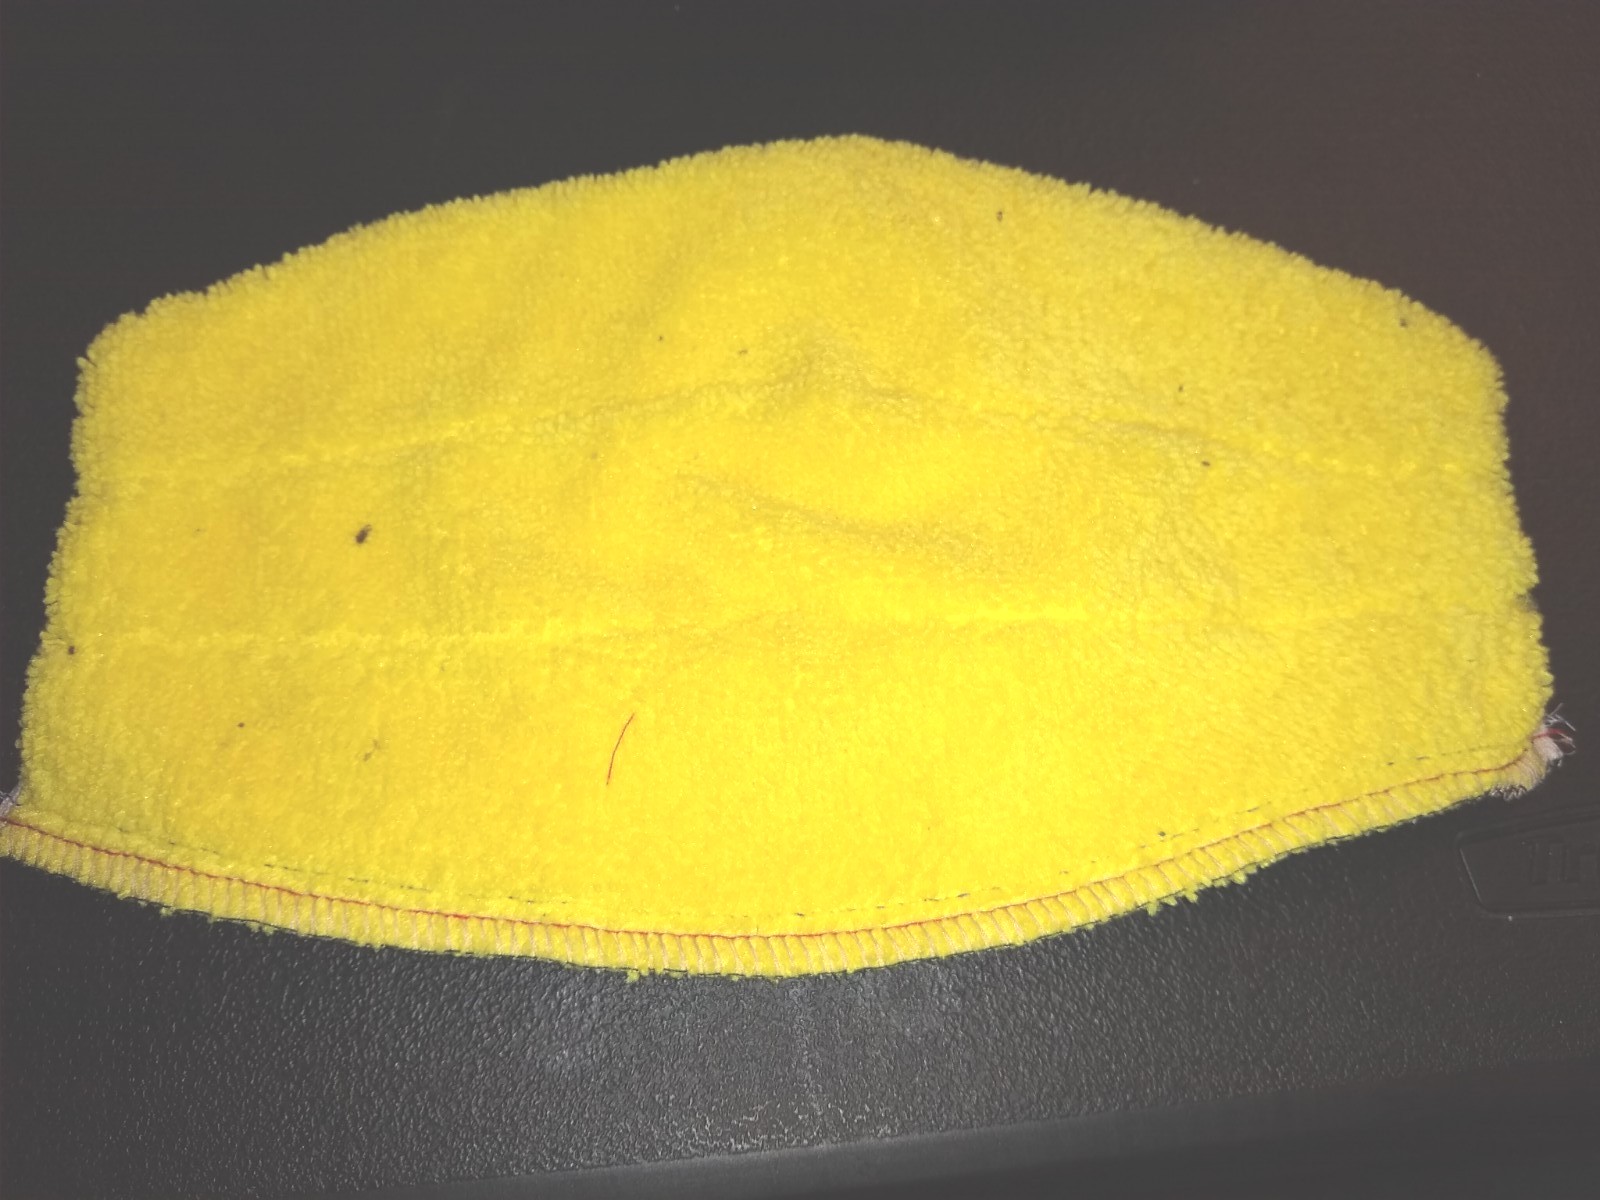
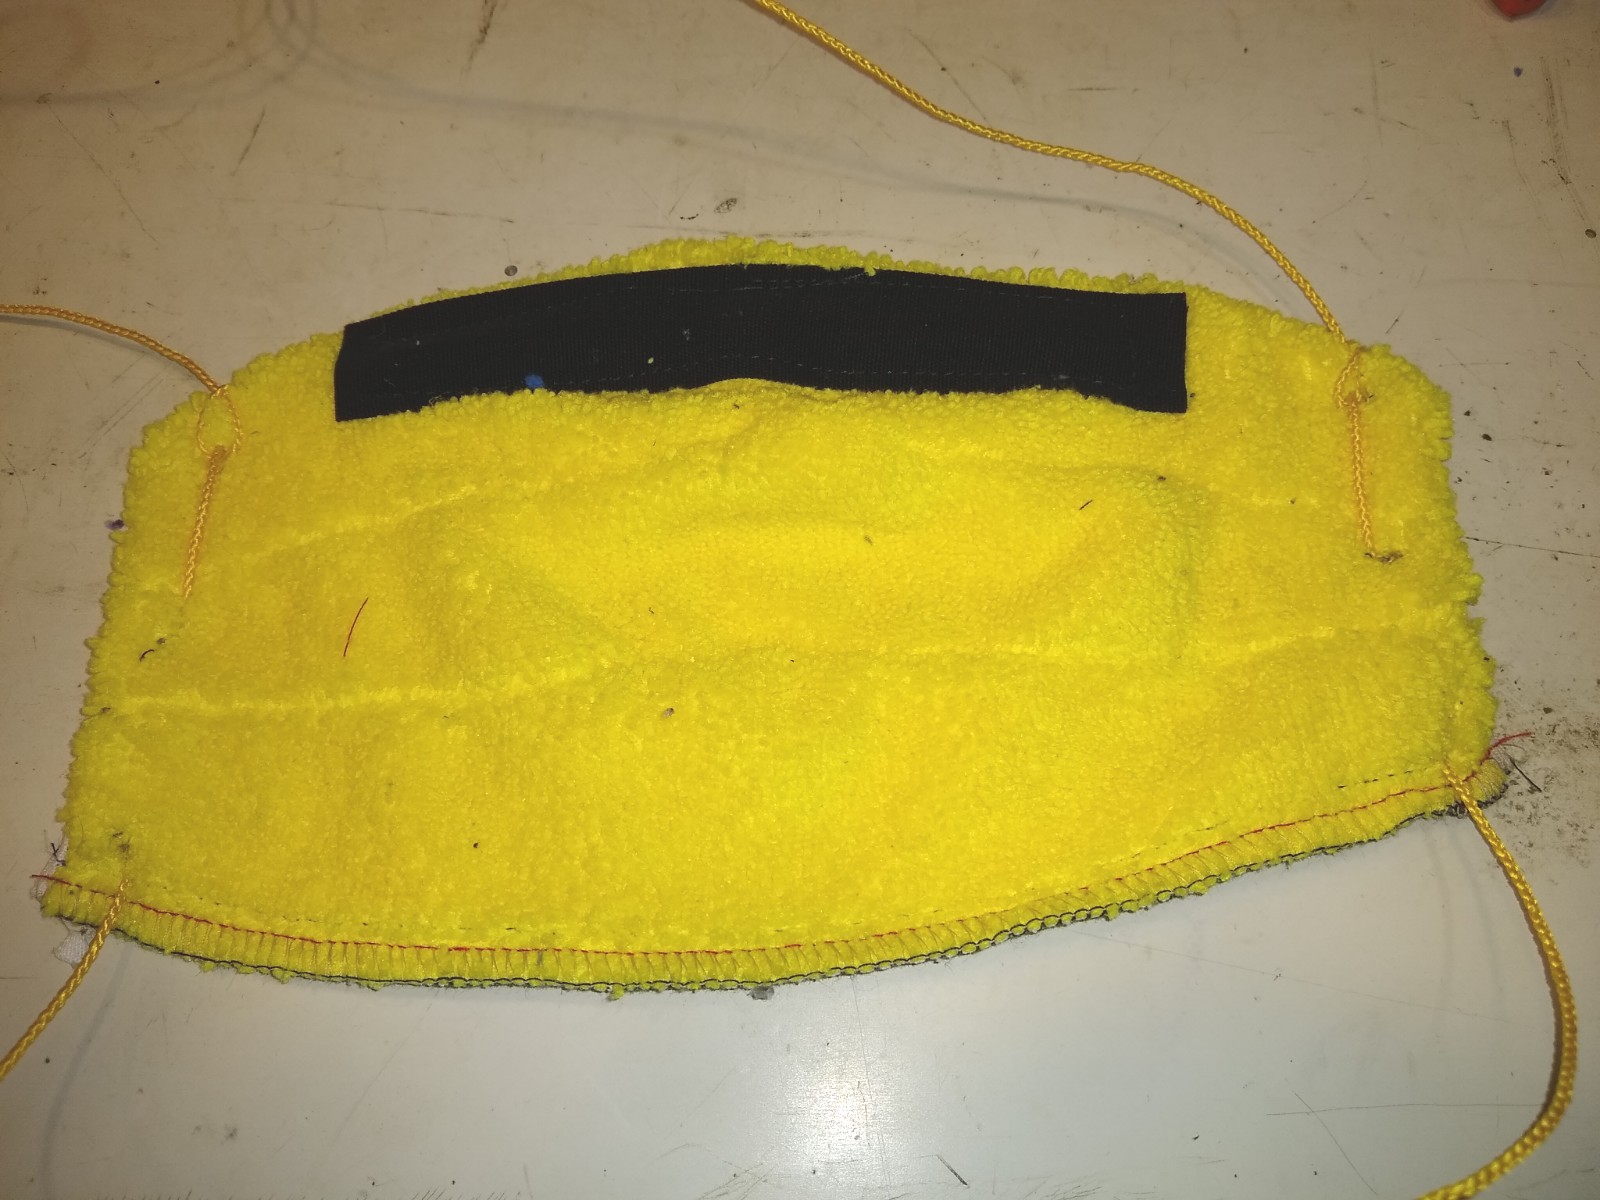
Here is the finished shell.
Now to add a tape in which a wire can be inserted so the mask can be adjusted to fit nicely over the nose.
I've been using black binding tape, but a patch of jean material or some other heavy cotton or poly material would work fine as well.
Use what you can find.
This tape is 6 1/2 inches long and 1 inch wide.
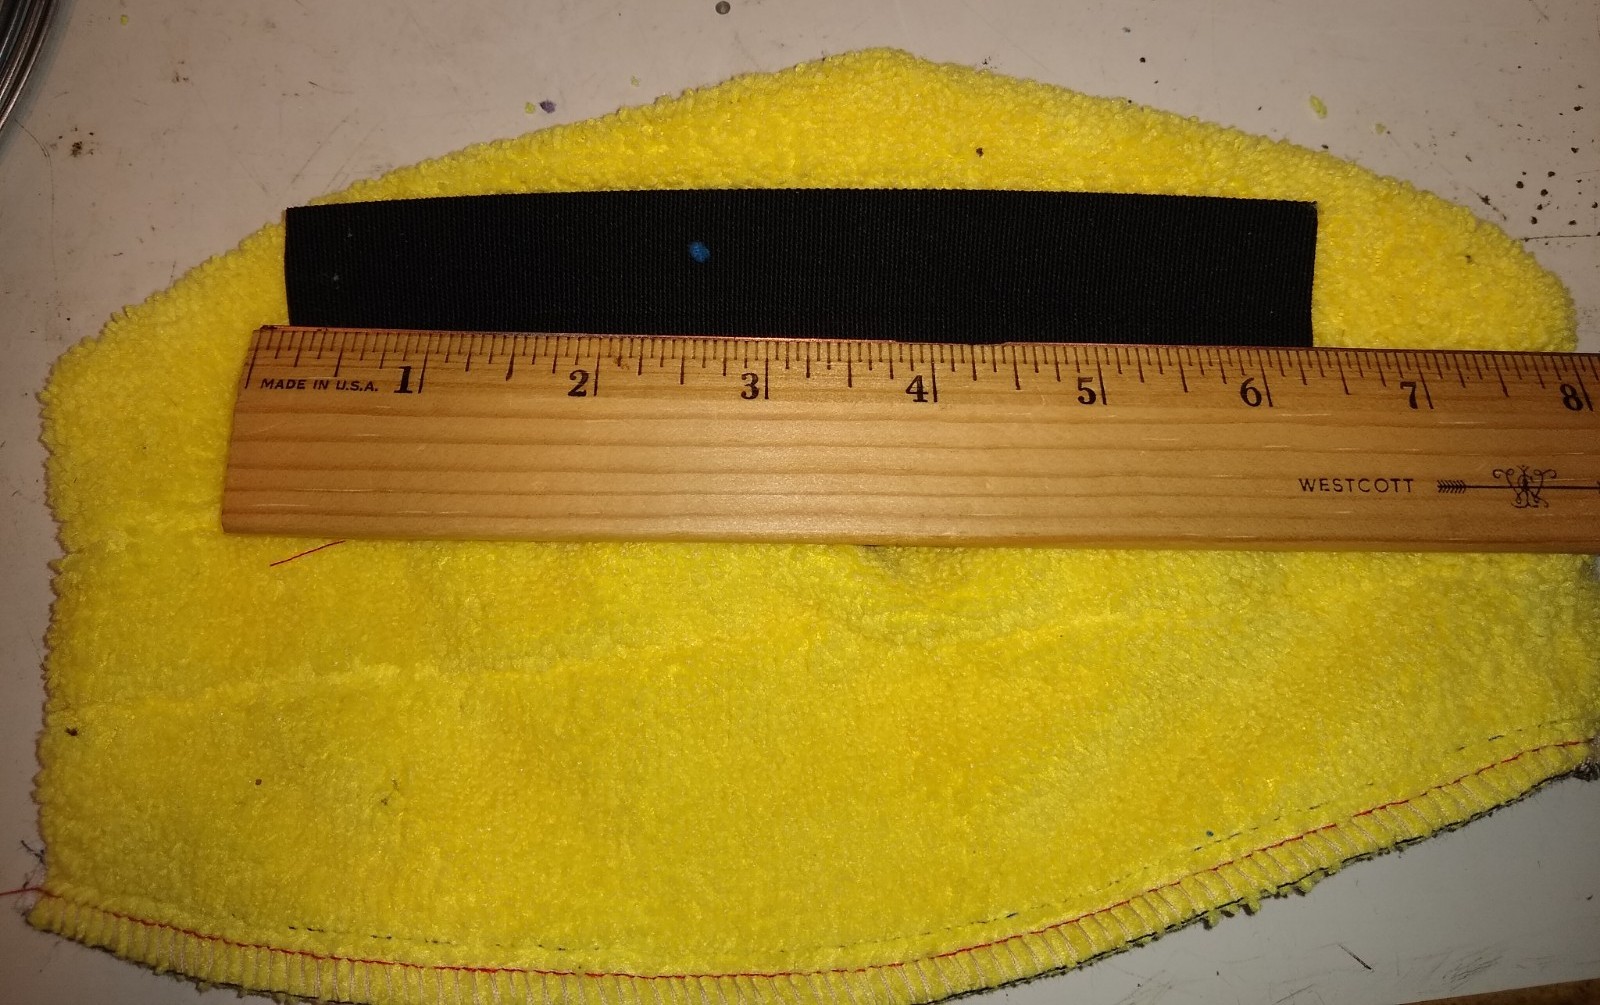
Sew the tape at the very top edge of the mask and curve it to match the mask.
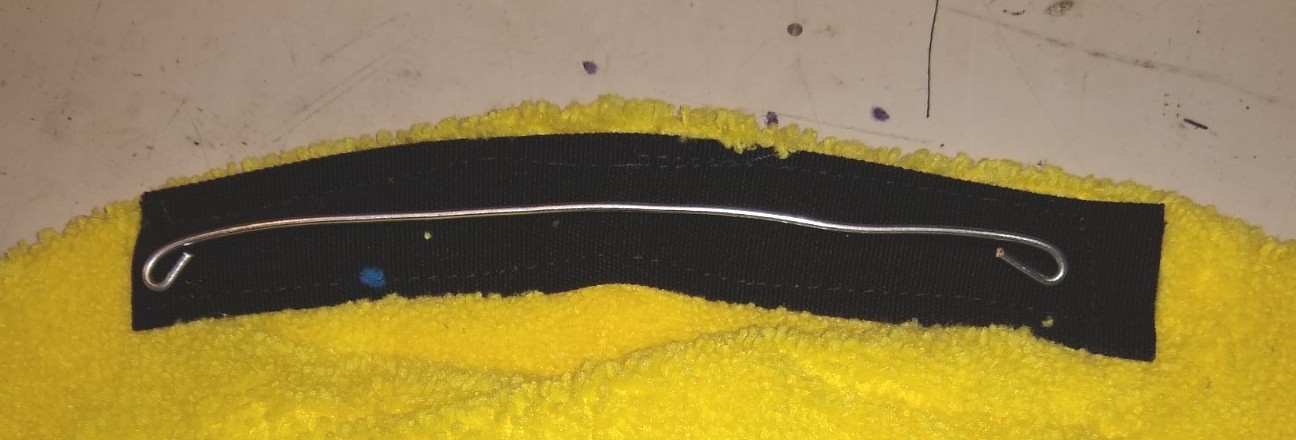
Sew along three edges so one end is left open so a link of wire can be inserted as an adjustable stiffner.

Cut a piece of wire and loop the ends, then slide it into the tape. This is 16 gauge galvanized wire, but a piece of thin coat hanger wire should work fine as well.
Galvanized steel is nice in that it doesn't easily rust.
A large paper clip, rebent, would also probably work ok.
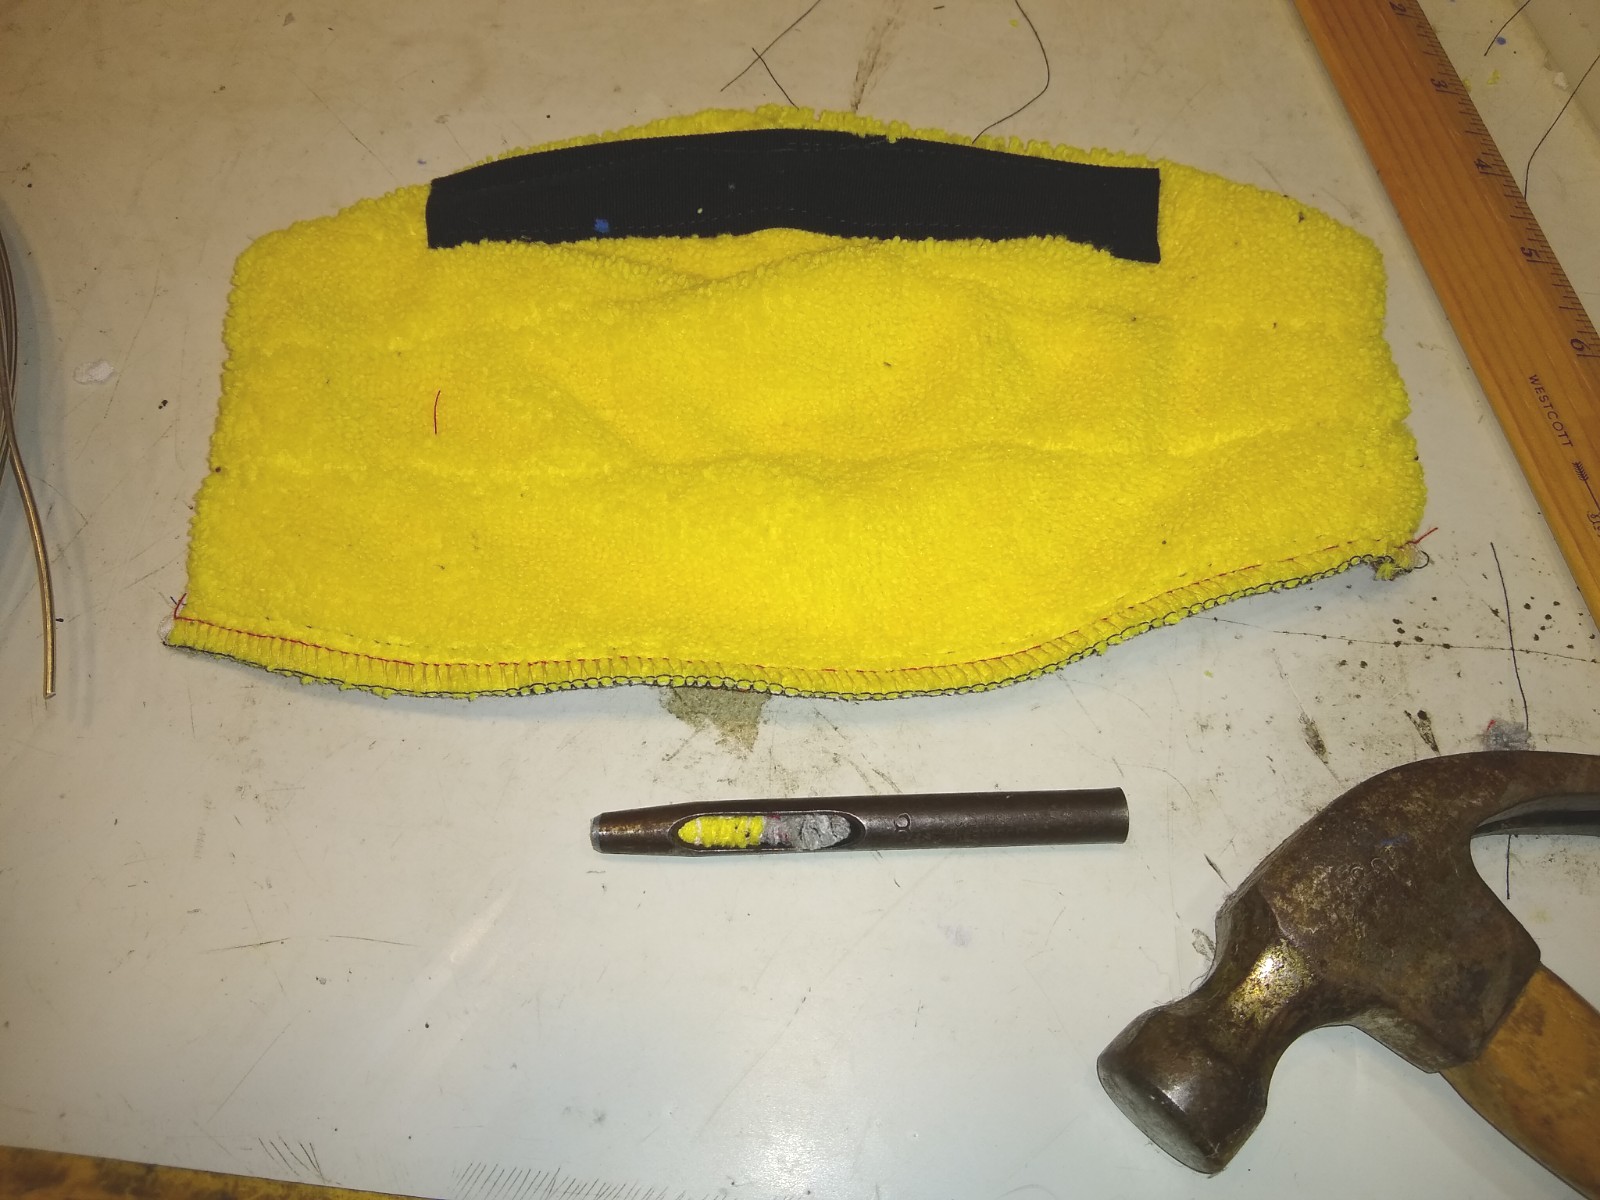
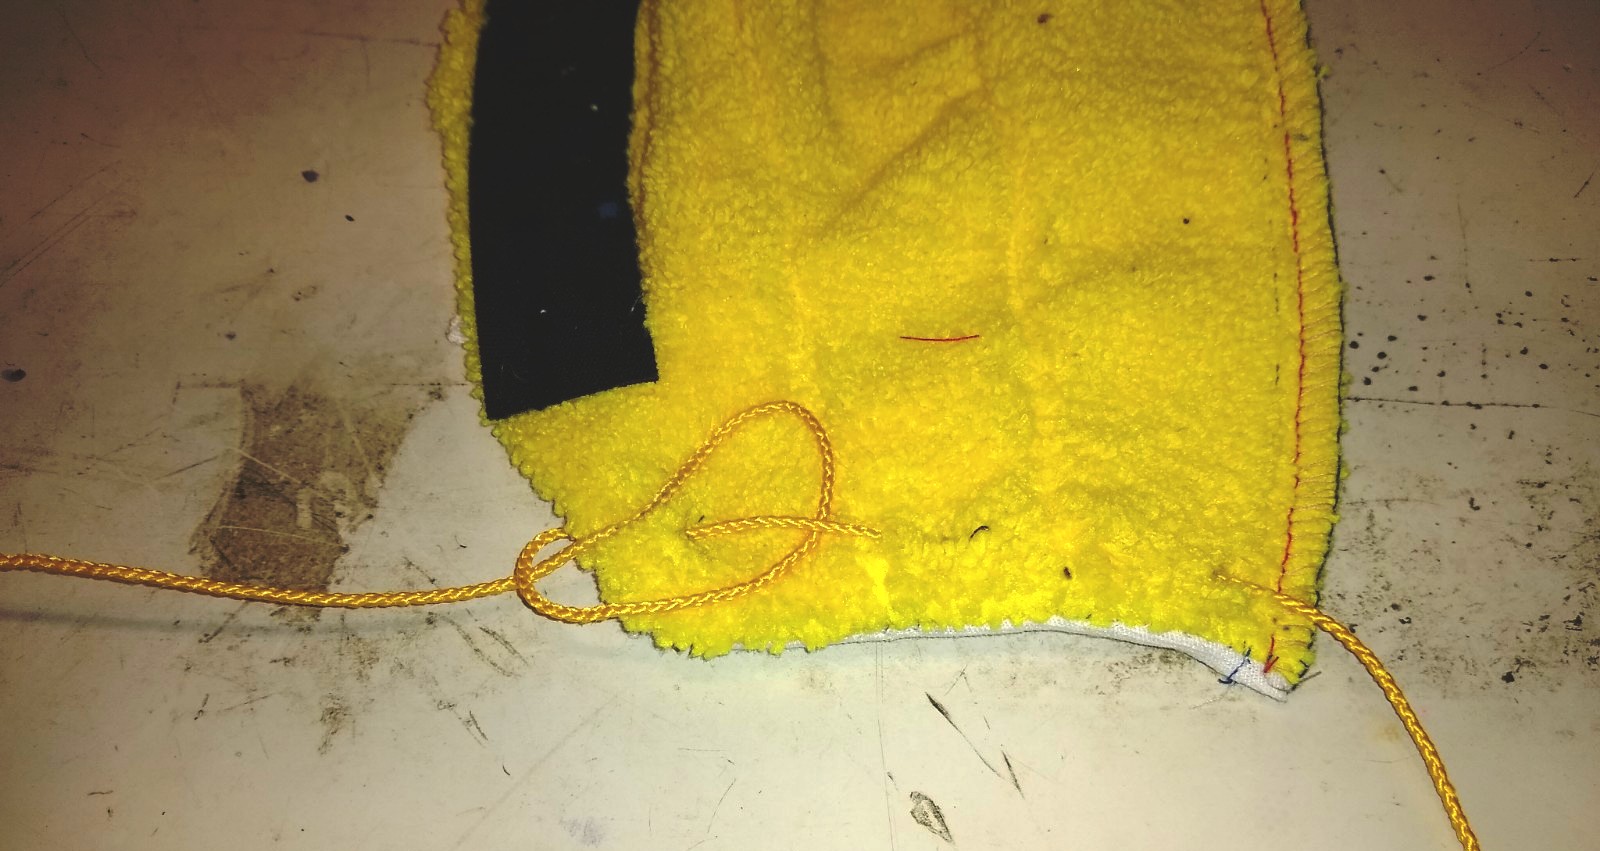
Next, we need to make 3 holes on each side of the mask. I have a hollow punch that works well, but a nail, paper punch and a number of other things can be used to make the holes.
Note the hole placement on the next picture. Hole placement is not critical. Just put one at each corner, and one in the middle on each side.
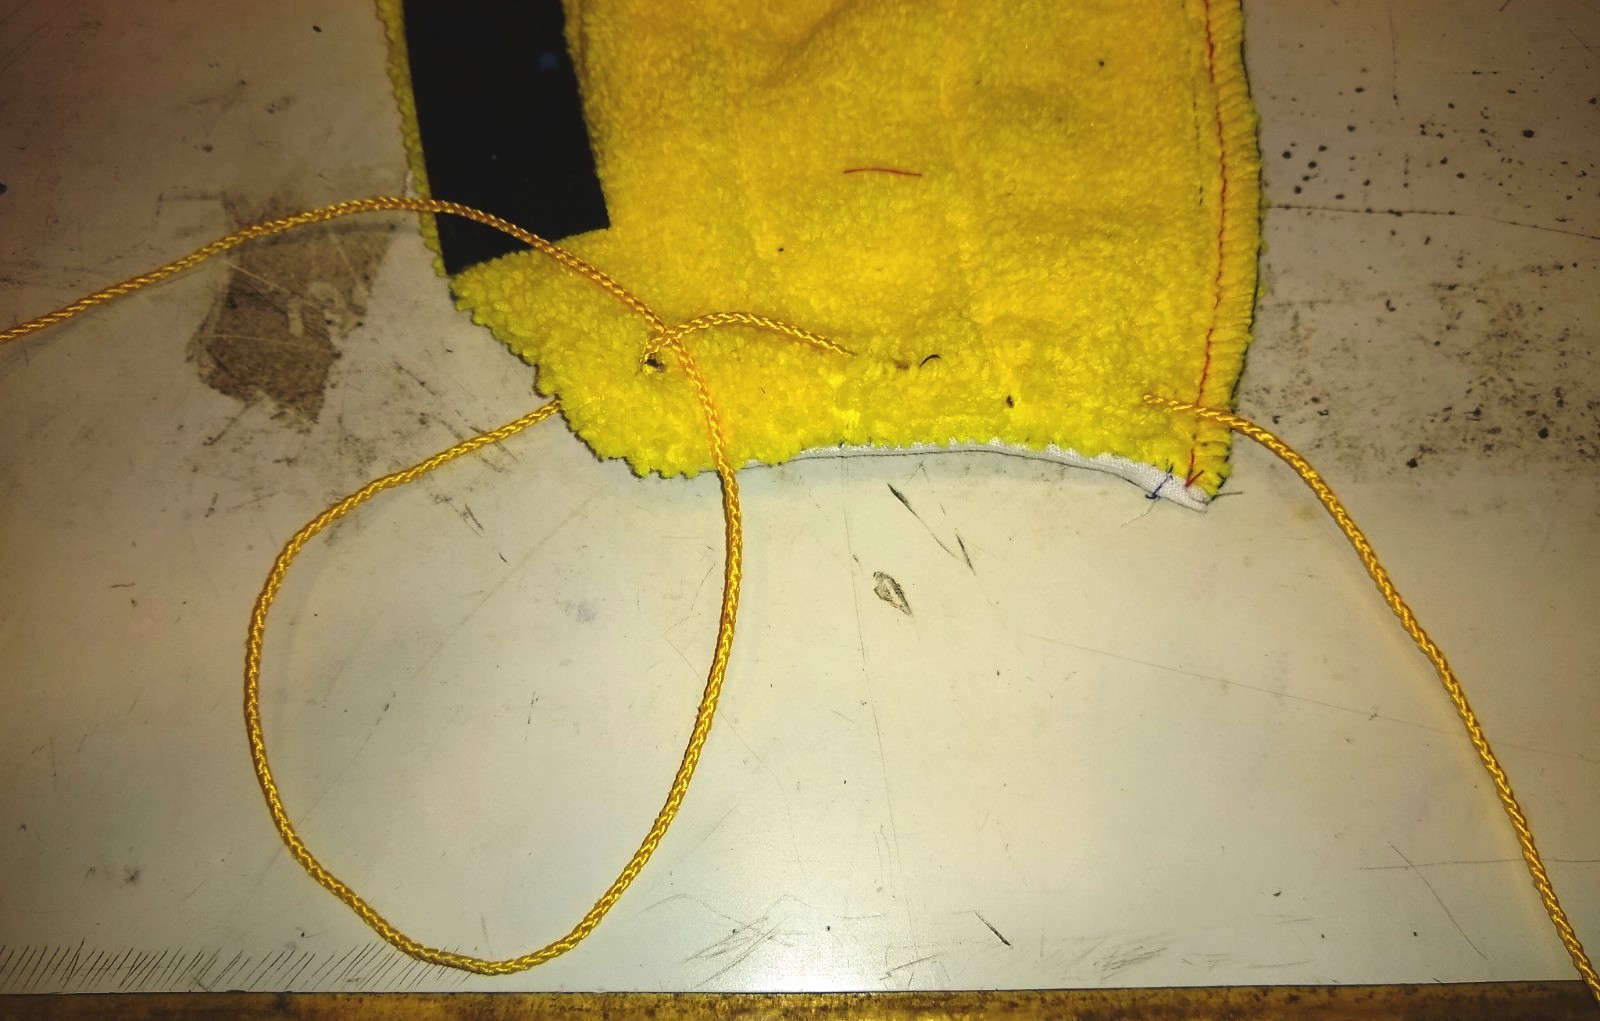
I'm using polyester cord for a two reasons:
1. I can't find elastic!
2. I had it.
3. Polyester cord holds knots very well.
I think that this cord is actually mason cord sold at Home improvement stores.
These cords go around the head and I use a shoelace knot to hold it on.
One cord is used for each side. Each cord is 50 inches long.
Note how the cord is threaded. Once you get the lengths correct, pull on both ends to set the knot.
Here is the finished mask:
You might want to brush it off or shake it to get the loose threads and fabric bits off before you inhale them!
Put the mask on loosely and bend the wire to fit your nose.
If you have it adjusted correctly; When you breath, the fabric should move in towards your mouth when you inhale and then move out when you exhale.
If you see any errors or ommisions, please send me an email at Dave9111@gmail.com
As Spock said; Live Long and Prosper!
Copyright - Dave Cole, 4/9/20
Users are granted an MIT License to insure the free distribution of this design.
This design may not be sold.
Dave